One of the many joys of my business is furniture over-hauls. Just like anything else, sometimes gems just need a lil’ polishing. Well, and cleaning, and painting, and sanding…. But, don’t get overwhelmed because a little work on your part can save you a lot of money on a custom piece at a show room.
My goal is to have FURNITURE FLIP FRIDAYS twice a month to share with you a before and after of a piece and how you can achieve a similar look, or if you want to purchase the flipped piece you could do that as well!
Today, granted isn’t a Friday, but I have a sleeping baby so let’s take advantage of that shall we?
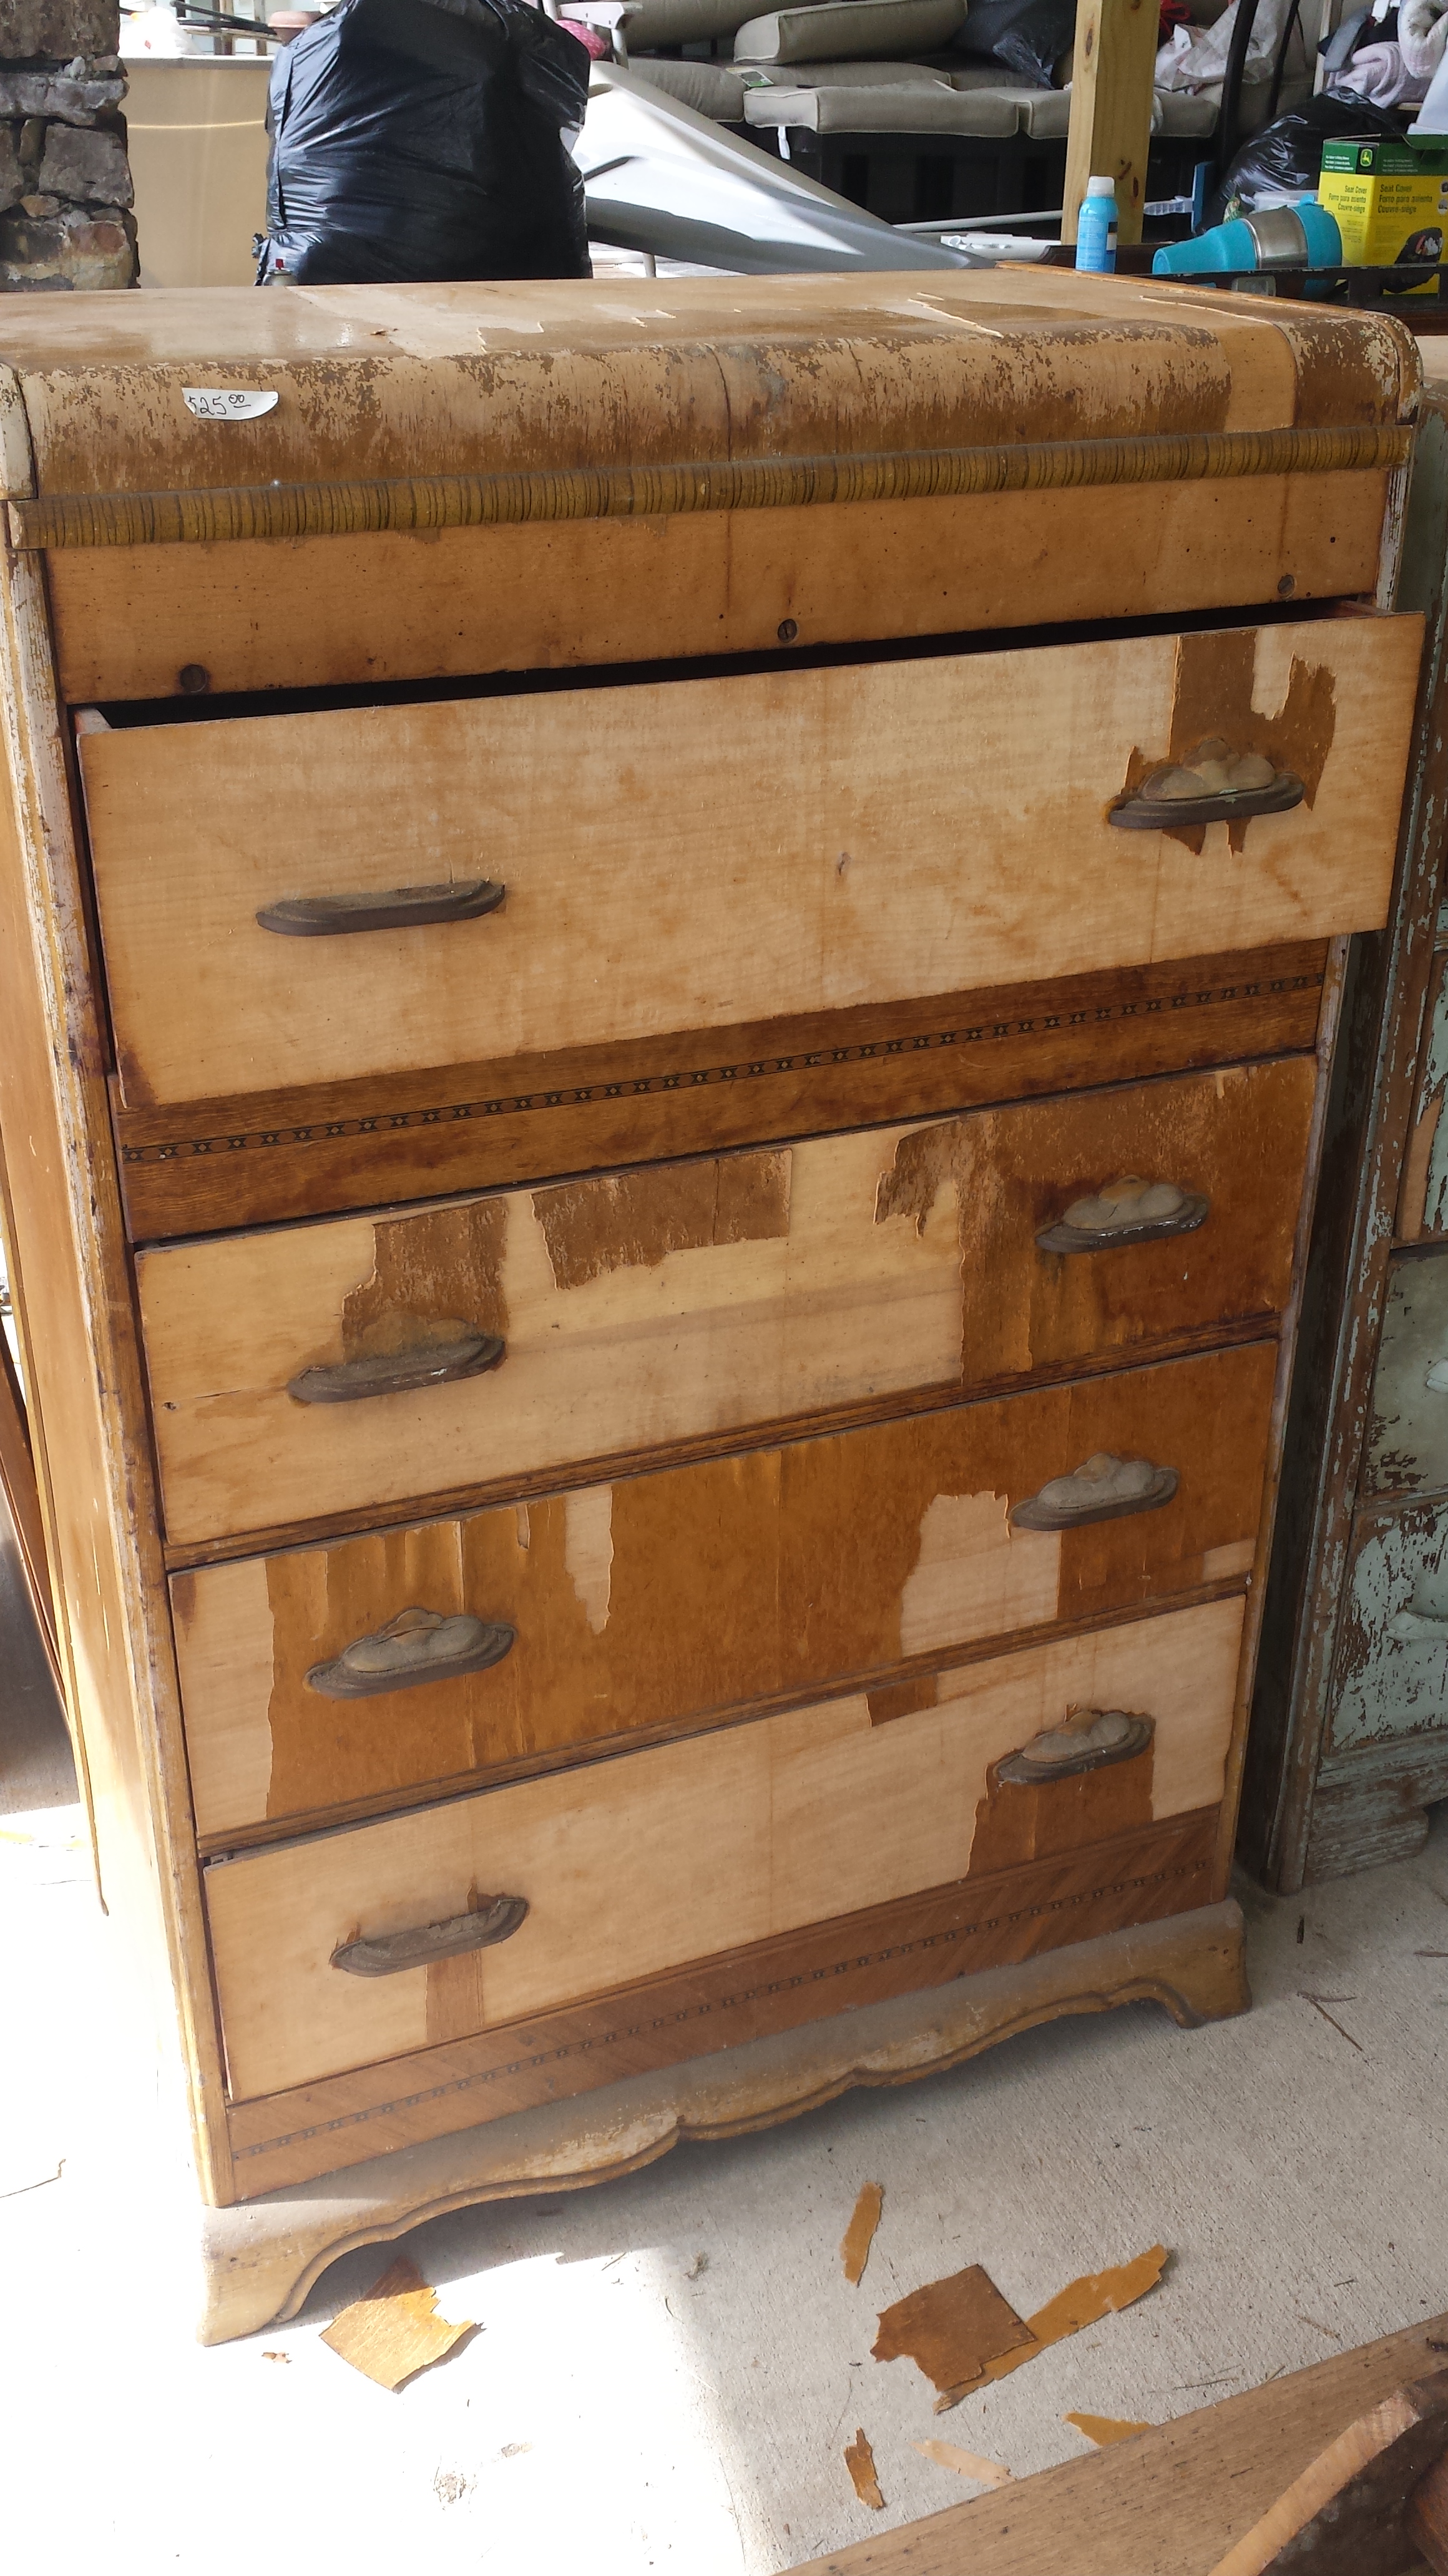
Ohhh….just look at her, so bruised and beaten. This is a vintage Waterfall dresser I found out in the middle of nowhere at a sweet couple’s home. Obviously, she had seen better days, but surprisingly she was in decent shape. Ok, granted this isn’t decent shape to most people. The veneer was horrible and falling off everywhere, but a great thing about old furniture is…wait for it….REAL WOOD!!! So, underneath that veneer was some beautiful wood waiting to be seen and loved by someone. So I paid the sweet couple and took her home and there she sat in our storage for a long while.
Finally, a few months ago (yes I am cheating and using an old furniture flip) I pulled her out and started work on her. Are you ready for her new and improved look? Drumroll please…this is where I would cue my sweet drummer husband….
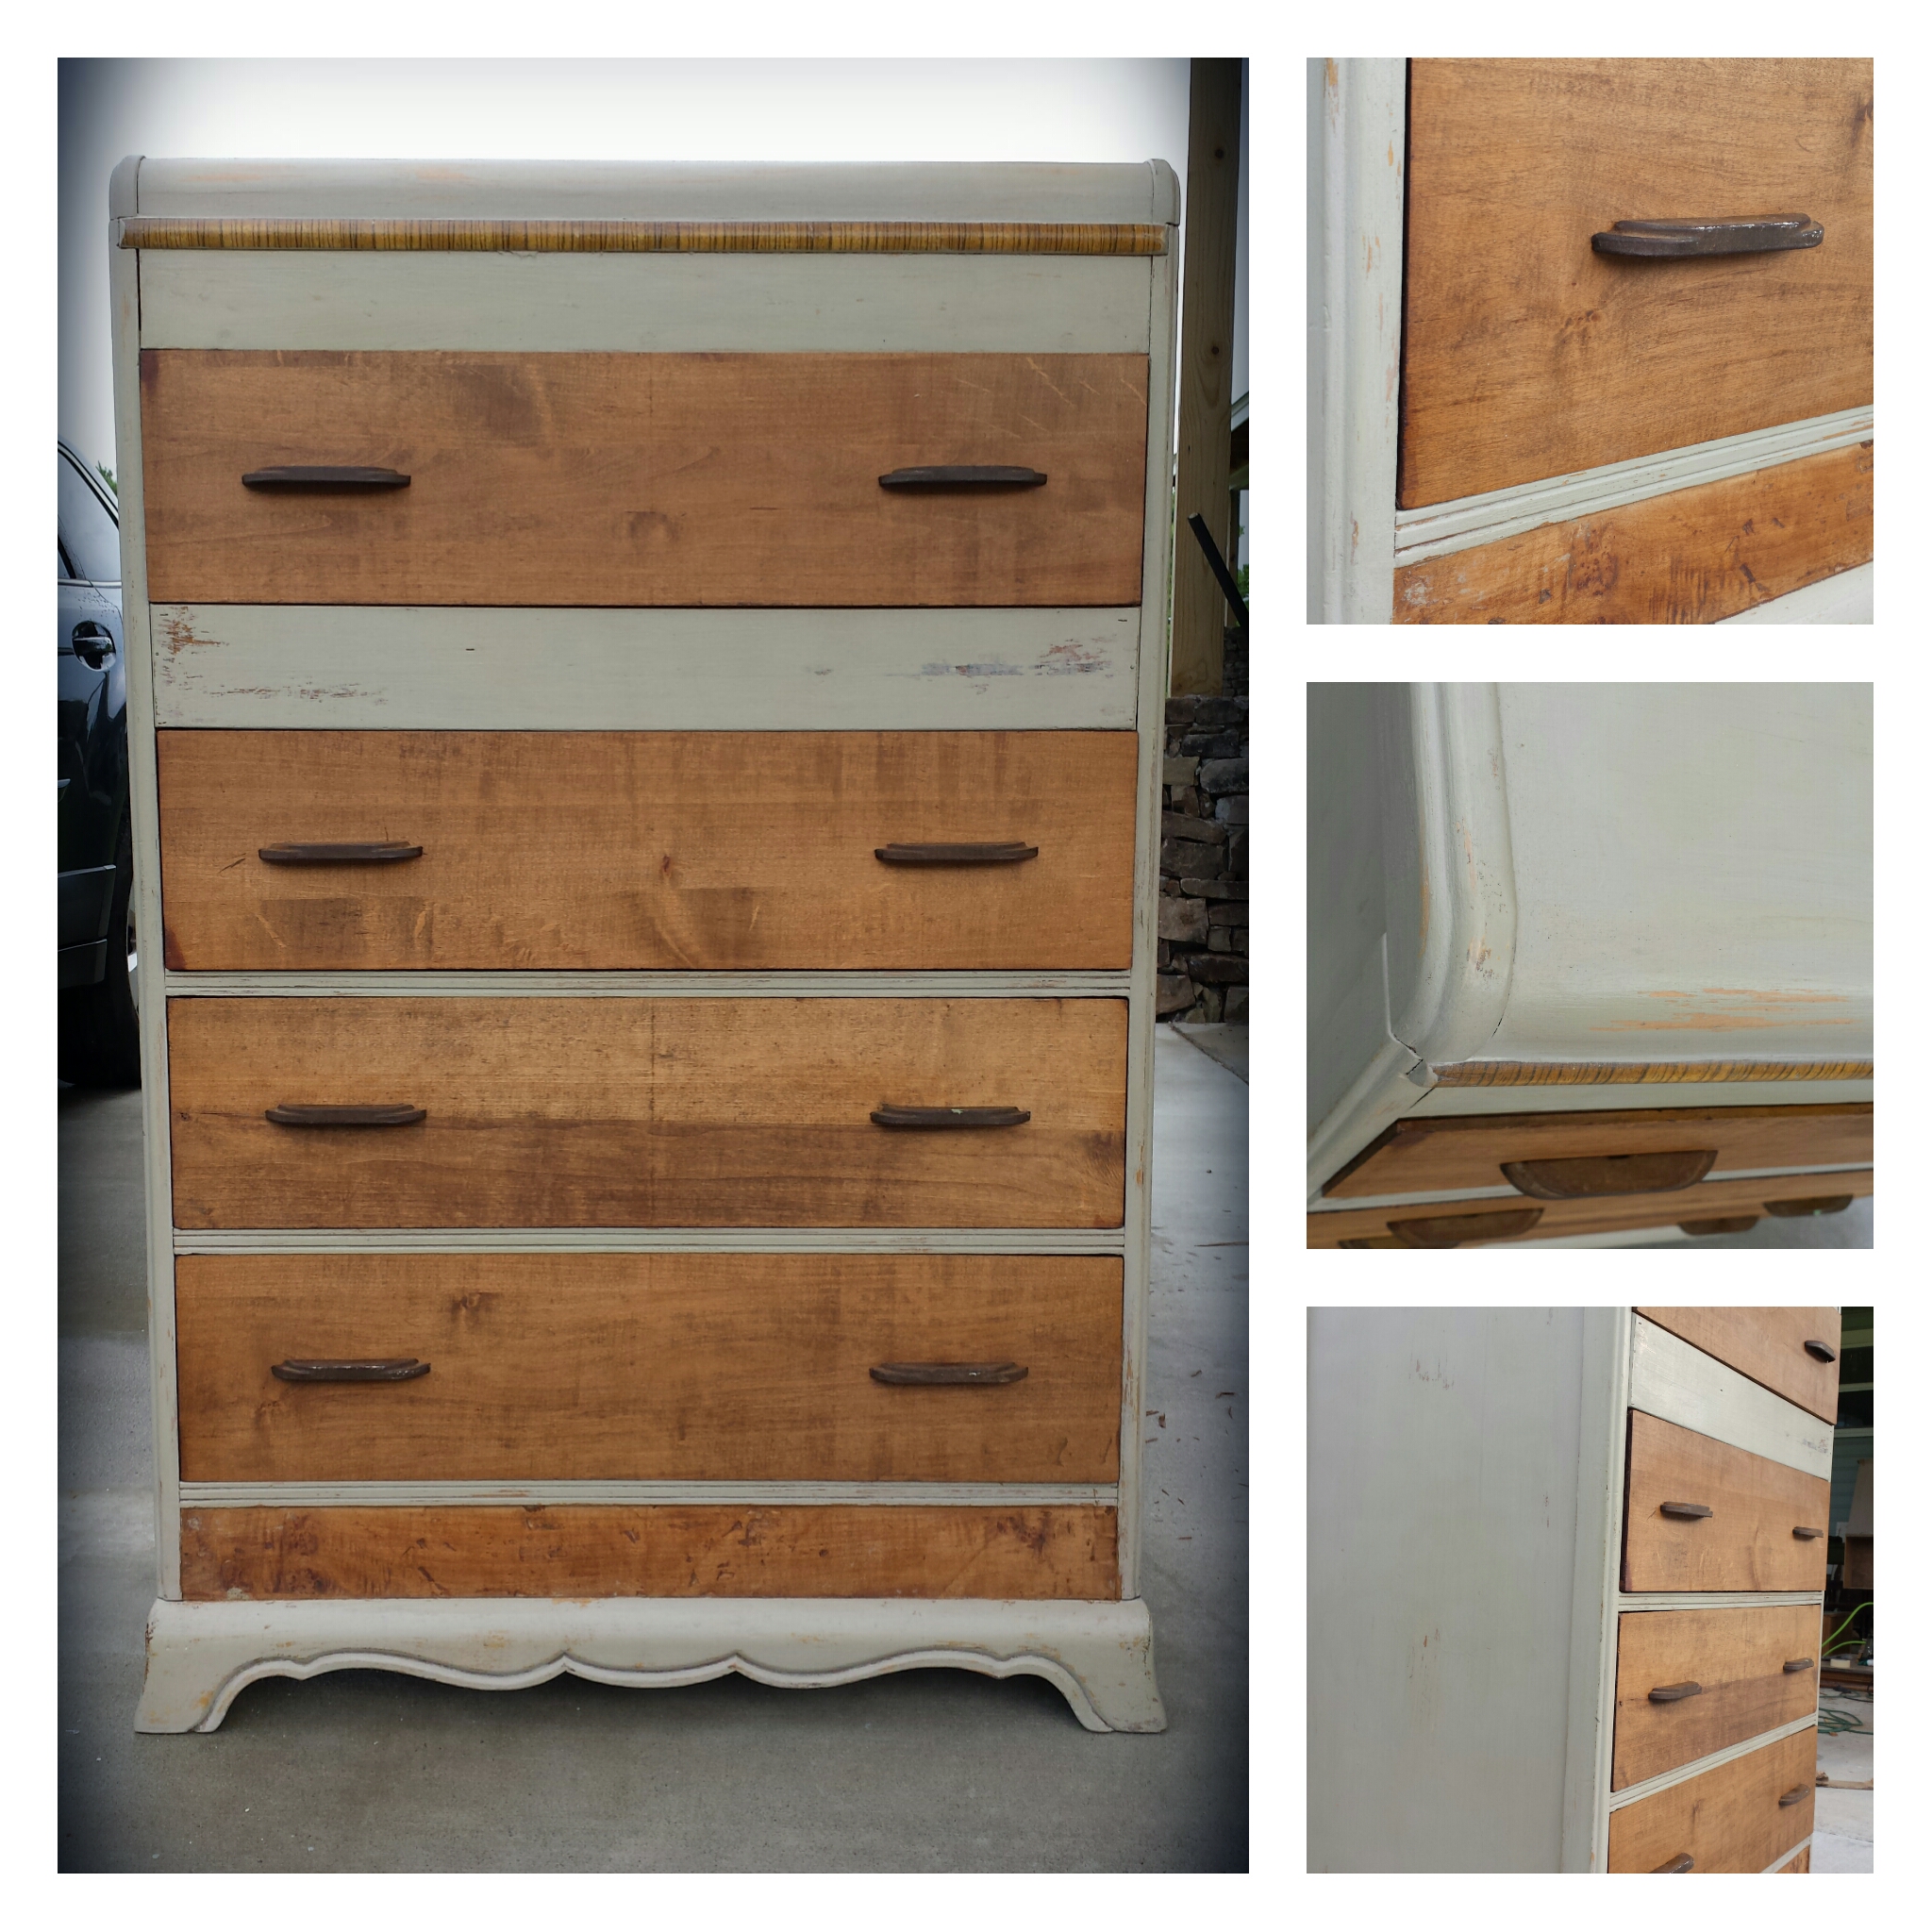
Went with a mod-rustic shabby chic vibe for this. A bit of Restoration Hardware meets Pottery Barn. And side note she already has a home with a sweet family so no adopting/buying this one. Now…for the how to.
- Clean, clean, and clean again. I personally use a mix of vinegar water, but totally up to you. This great time to remove the hardware and have it soaking in a cleaner as well.
- After a good drying out use a metal scraper to scrape off any old veneer. Mine came off relatively easy.
- Next, break out the old sander. If you don’t have one and you plan on refinishing more than one piece it is worth the $30 investment. I sanded the drawers to a very smooth, even finish because they were going to be stained, but since the body of the dresser was being painted with an amazing thing…CHALK PAINT (if you don’t know about it just go ahead and google it its amazing) I was really going for just getting out any major uneven areas .
- Hello paint…like I said I used chalk paint. I am not picky about brand there are 100 out there. You can find chalk paint at Home Depot, Michael’s, or even boutique-y (is that a word? haha) junk stores. For the color I knew I was going for something calm, beachy, clean. So I chose a light grey khaki that was such a great balance to the warmth in the pecan stain of the drawers. You may have to do more than one coat. I will say chalk paint goes a loooonnng way because it is so thick. Just FYI.
- Next use a damp rag and sand paper to distress your painted piece. I am not a fan of tons of distress, I think it looks too fake. So for me less is more on this step! Now step back and start on those drawers…not your undies! haha!
- The drawers need a good sanding since they will be stained so I recommend at least 120 grit before staining.
- Before you stain if you would like beat those drawers up, in a loving way of course. 🙂 I use a mix of things, really whatever is near. Generally its a screwdriver of some sort of a screw and hammer. Just slightly to give a bit more “rustic” appearance. These will pop when the stain is applied.
- Apply stain color of choice. I went with a pecan. Make sure it cures well before applying another coat. And ALWAYS sand with a fine grit sandpaper or sanding block between coats. Ensures a smooth finish.
- Now if you are happy with both of your pieces and they have cured (no tackiness to them…of course they aren’t tacky you just made them beautiful–haha, I mean tacky to the touch) time to apply a finish coat. There are a lot of options here. I personally go with one of two a polycrylic if it is going no where near water , so pieces that go in the bedroom or living areas or go with a polyurethane which is a more durable finish but it will yellow over time. Polycrylic won’t, but it isn’t as durable. So use your judgement here. There are times I might use a wax instead of polycrylic, but wax is even more tender than polycrylic.
- After your finishes have dried put your cleaned hardware back on and step back and smile at your beautiful uniquely you, reDesign’ed piece!!